The longer I teach the more interested I become in the process of mask making. Each group of students has a different view of what the purpose of a mask can be. Halloween is always a really good reason for masks, but by the time they reach 5th grade they can give me some more well thought out answers for example "Expressing one's emotions" or "Hiding identities".
African masks are a very popular subject matter, but I wanted to try to vary up the style a bit. This project studied Polynesian/Hawaiian style Tiki Masks.

- Rage Tiki.


Primary Tiki Tiki Masks - 3 forty minute sessions
In our study, we viewed visuals of tiki sculptures and discussed a variety of Tiki gods. We identified the way the artists would exaggerate certain features of faces. (Be aware when cruising online images, there are some inappropriate ones)
I posted some visuals with a variety of facial features on the board for inspiration and from there the students started.
Day 1: I gave each student a sheet of 11 x 14" posterboard (although you can use any other material you prefer) and a pencil. Students were first asked to shape the top, bottom, and sides of their mask. They could round it or keep the edges straight. Then cut out the shape you have drawn.


Then students had the task of designing eyes, nose, mouth, and design details. Having visual examples to look at were very helpful. We noted that many of the tiki featured large open mouths with teeth.

- Face details

This was a stopping point for us. After design was complete with pencil, we saved for the next session.
Day 2: I set out liquid tempera paint for the second session. Students were given the three primary colors RED, YELLOW, and BLUE. They were also given white and black. I emphasized with students the importance of painting the lightest colors first then ending with the darkest as to keep the colors as pure as possible. Black was for fine detail and outlining work.

When these were dry, I got out my crafty Xacto knife and cut out the numerous eye holes that called for removal. If students left a gap between the teeth of the jaw lines I removed that too.
Day 3: This day is optional if you feel like the second day gave the masks a level of completeness. I decided to give students one more day to collage scrap paper elements for a more refined work. I gave them paper left over from matisse collages. I emphasized the importance of SYMMETRY at this point and requested they keep that in mind when adding their paper elements.
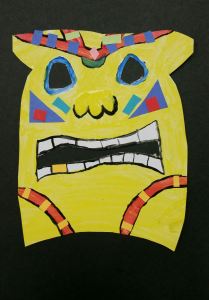
- I created this art work by cutting out cardboard and painting.

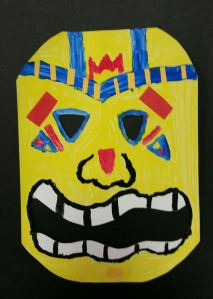
- 'Lil Tiki.

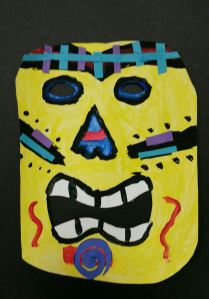 If students finished early, I let them create a Tiki Sculpture using a toilet paper tube and a 4 x 6" piece of white paper. Some of them turned out quite funny! Keep an eye out for a post on t.p. tube sculptures.

A few pointers on this project:
1. I'm not sure what it is about black paint, but they will go OVERBOARD with it. I give them specific instructions that it is a detail color and give them an especially tiny brush for painting with. Paint black last... it will alter all the other colors otherwise.
2. I don't think the white paint was necessary for us. Our poster board was already white so I think the paint really gave them more grief than helped.
3. I wanted to emphasize primary colors on this project, however this could be much more colorful. This could be a value study with shades and tints of browns much like the carved tiki sculptures. Lots of options here.


