I have experienced an irrational fear of chalk pastels. They are dusty. Children end up with all sorts of odd colors in their noses, mouths, ears, etc. Messy messy messy. Plus, I never used them before myself in my many years of art classes in public school or college. It was a foreign object to me.
However, I put on some big girl undies this school year and gave them a try. Chalk pastels won a student of mine a first place award in a system-wide competition and I was converted.
My students created an Native American Sunset Silhouette this year. This project was done by first graders, but could definitely work for any age upwards.
We first watched the story The Legend of the Indian Paintbrush by Tommie DePaola. [embed]https://www.youtube.com/watch?v=gyaifWkUWr0[/embed]
I asked my students questions that centered around colors they saw in the sky from the story. Then we went to work on our own sunset compositions.
Native American Sunset Silhouettes - 2 forty minute classes
Day 1: I placed a selection of chalk pastels (broken in half) into a dish in the middle of the table. I chose yellow, orange, pink, red, purple, and blues. Each student was to select 1 yellow, 1 orange, then choose either pink or red, then choose blue or purple as their darkest color. (You don't have to give them a choice, but my students like to have one)
I then showed students the steps to create a gradient.
I found this demo on the The Art of Education site and this is what inspired this project.
[embed]https://www.youtube.com/watch?v=oxbGTDawzms[/embed]
Then I sprayed them with hair spray after students left for the day.
Day 2: We talked about silhouettes this day. We viewed silhouette visuals... showing both people and landscapes. We also talked about shadows and how we can see them easier when the sun is positioned just right.
I gave students a black piece of paper the length of the gradient paper. They could keep it straight or change it depending on how they wanted the ground to look. This was their horizon line.
Then we reflected on the story we heard the week before. What kinds of objects would you find in the setting of that story?
Students drew with pencil onto black paper, then cut out and glued to their objects of choice onto their horizon line.
Many trees, bushes, and tee pees made their way into our landscapes. There were even a few horses and dogs. With the tiny students, I found giving them a horizon line to work off of was easiest. Older students could probably create a silhouette where the black paper is all one piece.
In all, the chalk pastels were still kind of messy. I experienced a rainbow every time I blew my nose. There was a chalk trail exiting my classroom door. However, I found that the brief mess was worth the results. I love chalk pastels now! Yahoo!


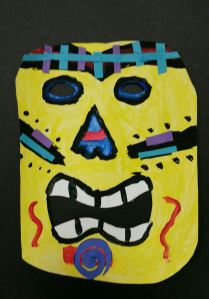 If students finished early, I let them create a Tiki Sculpture using a toilet paper tube and a 4 x 6" piece of white paper. Some of them turned out quite funny! Keep an eye out for a post on t.p. tube sculptures.


