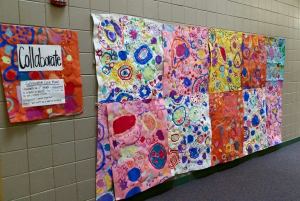
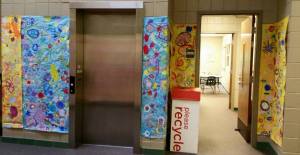
At my primary school my all time favorite activity is Circle Paintings. I got this idea from the blog Deep Space Sparkle. I found its a great way to get my students to collaborate and work together.


I set up tables with long sheets of butcher paper. I like color, but white or kraft would look sensational as well. I use a variety of cups and containers found over the year and put one color of tempera paint in each cup. Some cups can repeat a color, no biggie. One paintbrush in each cup. (I like to use old, crunchy, rough, sad-state brushes for this)
I ask students to define a circle and show me understanding by drawing in the air for me. Then I demonstrate that a circle could be created out of dots… a circle could be broken… it could be made from repeating lines. A circle could be empty or filled. Students put on their aprons. I ask them to select their own paint. Then the one rule is CIRCLES! No squares, triangles, etc. Now if they happen to create a person’s face or a snowman out of circles, I’m satisfied as long as they used circles.

I give students a select amount of time then ask them to rotate to the next table to use their color. I don’t allow them to wander to each paper because they will have a chance to reach each as we rotate. One point I want to mention is that students are also asked to only paint where there is a dry space. They can add circles over other circles as long as the paint is dry… not shiny.

I love to hang our results in the hallways for easy end of year display. I kept one set for a permanent installation in our entry way. Love love Love these! Give them a try yourself!
Some recommendations:
1. Throw some white in a few paint cups for variety. The tints will really make a great contrast.
2. This will be messy, but fun. Warn kids ahead of time to remember their paint rules and have wet wipes on hand.
3. Fill those papers. I usually have 2 classes work on the papers before I put them out to dry.
4. Have a large flat area ready for your works. I display ours on the school stage and they are usually dry by the time I’m ready to head home for the day.
This project is done with 1st graders in a 40 minute class time.

No comments:
Post a Comment