Wednesday, October 26, 2011

Can't Resist New Books

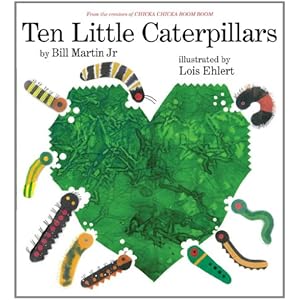
Our school book fair is being held this week and I can't seem to help myself when the scent of fresh books are in the air. The first book I found was Ten Little Caterpillars by Bill Martin and illustrated by Lois Ehlert. This is a great counting book for little ones (I'm thinking I'll read it to my Preks - 1sts) and at the end illustrates various types of butterflies and interesting facts about them. Excellent story book to start off a butterfly project in the spring.


Next I found Ocean Soup: Tide Pool Poems by Stephen R. Swinburne and Mary Peterson. These poems are clever and cute. I love the simple illustrations and the fun facts around the poems on the pages. Great reference for when we create Ocean/Seascape resists.


Next I found a book that really I didn't have a need for in my classroom, but I love this series. It holds a special place in my heart since I recall the original "If You Give a Mouse a Cookie" from my childhood. The latest in this series is If You Give a Dog a Donut by Laura Numeroff.


Lastly, I got a silly book Aliens Love Underpants by Claire Freedman. I love the illustrations and the story is very funny. I imagine my 1st through 3rd or 4th graders would love it. Not sure when I'll use it, perhaps if we create symmetrical alien collages or drawings.


Happy reading!
Monday, October 24, 2011

Shapely Farm Animals for Kindergarteners!

This week and next my kindergarteners are learning about the farm in their classrooms. To tie in with their curriculum, we are creating cow drawings this week. We are using different types of lines and shapes to create the cow and a landscape around it.

We first read a fantastic book called Click Clack Moo by Doreen Cronin. We observed the cows illustrated in the books and took note of the pattern on their bodies.

Then we began drawing first with black crayon. I drew an example on the board and students drew with me to create their cows. We used a rectangle for the body, long vertical rectangles for legs, an oval head, and triangle tail. We also added details like eyes, ears, nostrils, a 'chin', and spots.


Students then created a horizon line with green for the grassy landscape the cow lives in. Students colored green from their horizon line to the bottom of the paper.


Students also drew a yellow sun and a red barn using squares and triangles.
To complete our works, students then painted a watercolor wash over our papers with the exception of avoiding the cow. The best part was the amazement over the yellow crayon of the sun resisting the blue watercolor. Seeing the surprise in their little faces never gets old.


I love the way these turned out and they are all unique. (The faces alone vary each cow's personality) Next week we will work on pigs... I so enjoy just a simple animal of shapes!


This project took 1 forty-minute class.
Materials: Black crayons, green crayons, yellow crayons, red crayons, blue watercolor
Vocabulary: Rectangle, Square, Triangle, Oval, Circle, Horizon line, resist

Wednesday, October 19, 2011

Bugs bugs bugs!

I have a project that I've done for several years with my fourth graders, but for some reason took a break from it the past couple. After puzzling on what project I wanted to do next, a few classroom teachers urged me to create our Symmetrical Insect drawings again. My teachers love it and it usually ties in well with their science studies.
I begin by introducing students to insects with a powerpoint I've created. We talk about "symmetry" and that insects are symmetrical. I tell students to pretend they are an explorer in the rainforest and you have discovered a new insect. What would it look like? I then create rules for this project. (written on the board) 
1. Insects must have three main body parts - head, thorax, abdomen
2. Insects must have 6 legs
3. Insects should have compound eyes and antennas
4. Insects must have original patterns and designs
5. Insects may have details such as wings, stingers, pinchers, etc

The first day students draw their insects with pencil, then trace with black sharpie. I ask students to choose 3 shapes of their choice for each body part. The second day students then begin to color with markers. My father happens to be an entomologist so he can usually scrounge up an insect collection for me to share with my students which they love! (Well mostly, I have some kids that are totally creeped out) Because these drawings are large on 12 x 18" paper it usually takes a third day to complete the coloring.


I also have fifth grade advanced students working on paper mache' birds. I think we are off to a great start!


This is an excellent recycling project. We are using two-liter bottles as our base. The head is formed from newspaper, then covered in aluminum foil. The beak is also aluminum foil hot-glued to the head. Lastly our wings are made from scrap posterboard. I am so eager to see them in paper mache'.

Saturday, October 8, 2011

Gearing up for Fall

This fall has definitely turned into much more of a wild ride than I expected. I have tons of projects going on with all my grade levels, prepping for my state conference in November, photographing, hanging works, updating my school webpage, and dealing with a new health problem that has led to allergy shots... Sheesh. Boredom isn't part of my vocabulary. :) 

I have a couple of new projects to share that turned out rather nicely with my 3rd and 4th grade students that are a perfect sign of the season.

My third grade students created Warm and Cool Color Pumpkin Drawings. We discussed the three warm colors (red, yellow, and orange) and the three cool colors (blue, green, and purple). Students drew a simplified pumpkin shape (a template can be used here), drew a grid with horizontal and vertical lines (we used straight edges), then traced with a black sharpie. Then students had to take their time and carefully color inside their pumpkins with warm colors (this part definitely requires a lot of thought). We pressed hard so that our crayon would be slick and shiny! Lastly, we did the same with the cool colors. One of our goals was to make the pumpkins look like a patchwork quilt -- same colors weren't side by side. I love how these turned out. This project could be done with lots of other shapes as well.


My fourth graders also created pumpkins recently, however ours involved creating a variety of values. This idea I came across on another art teacher's blog. We started drawing on light green 9 x 12" construction paper. Outlined the shape of a pumpkin with pencil. Students traced with brown oil pastel, colored in with yellow oil pastel, then slowly blended in orange then red. These are super! I am not a fan of oil pastel for the fact I inevitably have students to get it on their clothes, but this will be a repeat project. Also, progressing from green to yellow then orange was a rather fun way to connect to the natural growth of a pumpkin.


A fun story book to connect to this project would be: The Biggest Pumpkin Ever by Steven Kroll although this is more of a Prek -2nd level book.


This next week we will be wrapping up a few other things and getting 2 days off for fall break! Yay! Then I'm looking ahead to Gee's Bend, Symmetrical Insects, and perhaps some snakes!