Color-full Bird Masks - 2 forty minute class sessions
Day 1: I introduce colors to my students with this really great youtube video by OkayGo. This video is usually up for special requests frequently during the school year.
[embed]https://www.youtube.com/watch?v=yu44JRTIxSQ[/embed]
We talk about the colors we saw and review which were primary and secondary.
You might want to replay it a few more times during the next step just 'cause you can.
Then students draw a random line picture with black crayon on 9 x 12" white paper.

I usually direct them to choose certain lines. For example: "Choose a place on your picture you want to draw a straight diagonal line. Next choose a new place to draw a straight horizontal line." You could even make a Piet Mondrian reference if you desire. Lots of places to go with this!
Then students paint their composition with primary colors. RED, YELLOW, BLUE.

These dry in the drying rack that day and I save them for the following week. If they paint over lines or the colors get mixed a bit its no biggie. We are chopping these up the next session.
Day 2: This session requires a bit of prep on the part of the adult involved. I had to cut a bazillion eye holes with my Xacto knife for 125 masks over a weekend in preparation. I also hot glued a popsicle stick handle to the side of each mask before giving it to students.
You can use half of a paper plate or pre-cut posterboard like I did. (Once again, I cut out all the masks but the posterboard is sturdy and I get it for free from a local business)

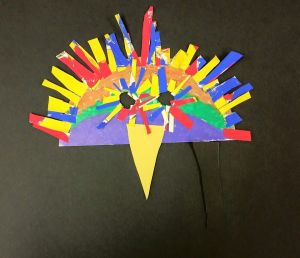
Students are given 3 water-based markers* in the secondary colors: Purple/Violet, Orange, and Green. I ask students to pick one color at a time and go in an order they would prefer. We color the secondary colors up our mask.

Now its time to destroy..err.. cut up that primary colors composition from last time. I ask students to cut long strips from the primary paper. It is not necessary to use it all and I save scraps for other fun projects. Then draw a rainbow of school glue across the top of the mask. Stick primary strips to the glue to create a feathery looking head. If strips are too long, give the bird a hair cut to get the right length. Those scraps can be used to give the bird eye lashes around the eye holes. Students can also curl feathers or leave flat. Its a matter of preference.
I then give students a yellow rectangle of construction paper. They draw the tallest triangle they can make and cut out. Glue to the bottom of the mask. You can also add glitter to this project if you like. I avoid glitter whenever possible and this one looks delightful without it.
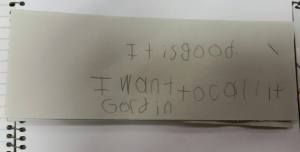
One additional thing I do with students is ask them to write an artist statement about certain works. This could be anything from describing how they made it, saying what they like about it or, giving it a title. This is my favorite artist statement about this project.
**I use Crayola waterbased markers the majority of the time.


No comments:
Post a Comment